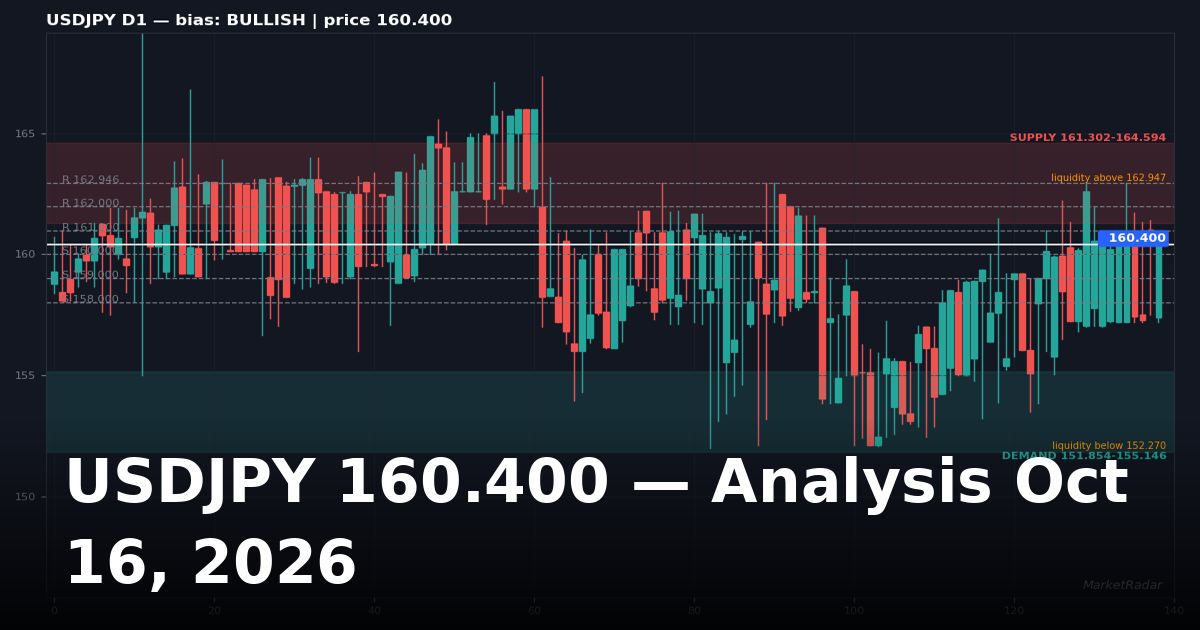

MarketRadar read: neutral
US Dollar / Japanese Yen (USDJPY) trades at 160.400, climbed +0.00% in the last 24 hours. Day range: 157.201–160.841. Here are the levels that matter across timeframes, each marked on its chart, with the fundamental backdrop underneath.
Market snapshot
| Metric | Value |
|---|---|
| Price | 160.400 |
| 24h change | +0.00% |
| Day range | 157.201 – 160.841 |
| Previous day high / low | 160.841 / 157.200 |
| Previous week high / low | 162.948 / 157.199 |
Previous session — where the day closed
The last daily candle closed at 160.400, higher by +0.00%, after trading between 157.200 and 160.841.
That is closing inside the previous session's range — no clear winner into the close. The close sits above the 50-period average at 157.687.
Fundamental backdrop
- No fresh market-moving headlines in the last scan window; price action is leading.
Standing macro backdrop: the Fed's stance is hawkish / tightening cycle; after a 25bp HIKE on 2026-09-16; September NFP printed 29,000 vs 90,000 consensus — a big dovish miss. (MarketRadar macro desk, updated 2026-10-14.)
D1 — USDJPY daily
Price 160.400 — structure favors buyers on the daily chart (50-period average 157.687, ATR 4.116). Resistance: 161.000, 162.000, 162.946. Support: 160.000, 159.000, 158.000. Buy-side liquidity sits above 162.947. Sell-side liquidity rests below 152.270. Supply zone 161.302–164.594; demand zone 151.854–155.146. Daily closes carry the most weight — when D1 and H4 agree, the move usually has legs.
H4 — USDJPY 4-hour
At 160.400, no clear directional edge on the 4-hour timeframe (50-period average 159.367, ATR 2.639). Overhead hurdles: 161.000, 161.327, 161.411. Downside cushions: 160.000, 159.000, 158.000. Buyers' liquidity pools above 161.369. Sellers' liquidity pools below 157.200. Overhead supply sits at 160.356–162.466, with demand at 156.145–158.255. The swing trader's execution timeframe.
H1 — USDJPY 1-hour
The hourly picture at 160.400 shows no clear directional edge (50-period average 159.437, ATR 0.683). Sellers are stacked at 160.841, 160.959, 161.000; buyers at 160.000, 159.000, 158.000. Resting buy orders cluster over 160.980. Resting sell orders cluster under 157.202. 160.568–161.114 marks the supply zone; 156.931–157.477 the demand zone.
M15 — USDJPY 15-minute
160.400 on the 15-minute: no clear directional edge intraday (50-period average 159.467, ATR 0.000). Intraday cap 160.841, 161.000, 162.000, floor 160.000, 159.000, 158.000. Watch supply at 160.841–160.841 and demand at 157.204–157.204. Entries only here. Never take directional bias from M15.
Key levels to watch
| Level | Type | Spotted on |
|---|---|---|
| 162.946 | Resistance | D1 |
| 162.000 | Resistance | D1 |
| 161.411 | Resistance | H4 |
| 161.327 | Resistance | H4 |
| 161.000 | Resistance | D1 |
| 160.959 | Resistance | H1 |
| 160.841 | Resistance | H1 |
| 160.000 | Support | D1 |
| 159.000 | Support | D1 |
| 158.000 | Support | D1 |
Scenarios
Bullish — buyers hold 160.000: the trigger is a 4-hour close back above 161.000, which opens the path toward 161.327. Confirmation strengthens if the hourly structure flips bullish as well. This view fails on a 4-hour close below 160.000.
Bearish — sellers break 160.000: the trigger is a 4-hour close under 160.000, which exposes 159.000 next. This view fails if price reclaims 161.000 on a 4-hour close.
Neutral — chop between 160.000 and 161.000: both edges are the levels to watch; a 4-hour close outside picks the direction.
Levels are zones, not exact lines. Waiting for a 4-hour close beyond a level filters out most intraday noise.
Charts
A quick note on the SBT lens used below. Structure-Based Trading defines ten models, and every one of them is built on the same foundation: a proper 123 swing pattern, a break of structure (BOS), and a price-delivery array — an order block, fair-value gap or mitigation zone — where price is expected to react. Each chart reading names the SBT model forming on that timeframe when its criteria are actually visible, and says so plainly when none is.
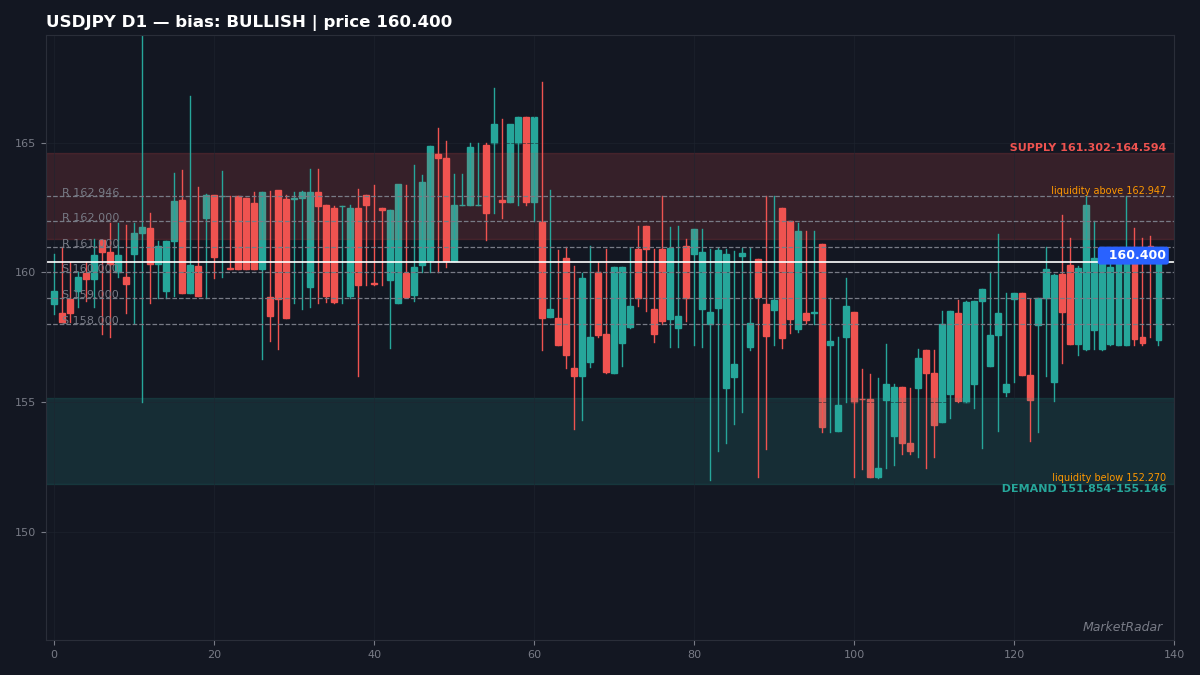
Chart reading — D1: No clean 123 on this timeframe — price is drifting bullish inside its range. Price wicked into the supply zone 161.302–164.594 and held — sellers defended the PD array, the retest SBT Models 7/8 wait for. Turtle soup: bearish liquidity at 162.947 was swept and price closed back inside the range. SBT Models 9/10 are built for exactly this — the sweep is the inducement, and the opposite PD array is the next magnet.
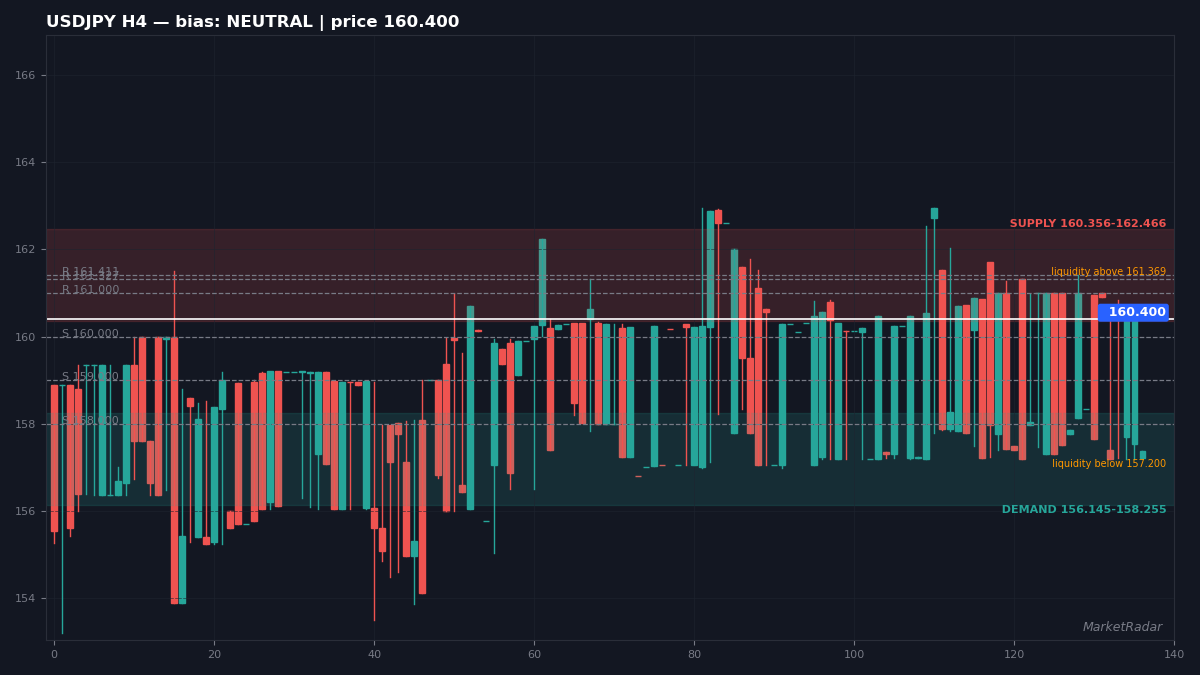
Chart reading — H4: No clean 123 on this timeframe — price is drifting neutral inside its range. A wick probed the demand zone 156.145–158.255 and was absorbed — buyers defended the PD array, the retest SBT Models 7/8 wait for. Turtle soup: bullish liquidity at 157.209 was swept and price closed back inside the range. SBT Models 9/10 are built for exactly this — the sweep is the inducement, and the opposite PD array is the next magnet.
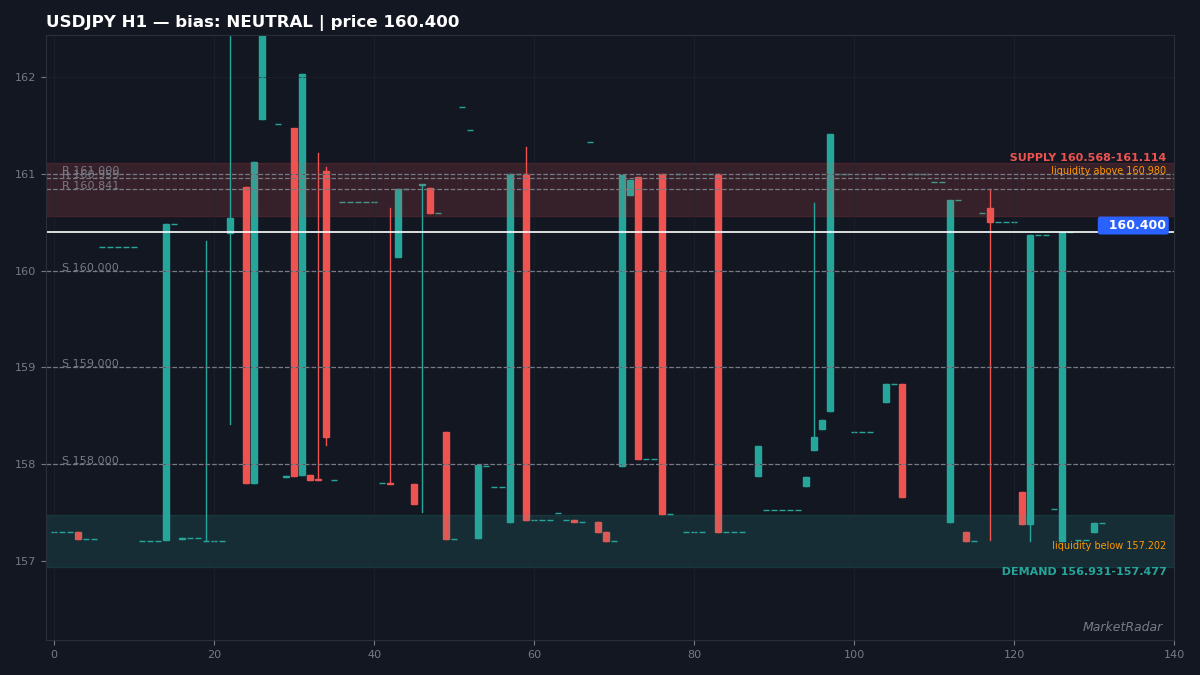
Chart reading — H1: No clean 123 on this timeframe — price is drifting neutral inside its range. Demand 156.931–157.477 below, supply 160.568–161.114 above — both PD arrays untouched; the first test decides the range scenario. Matching highs/lows mark 160.980: resting buy-side liquidity. A sweep there before the real move is the inducement leg SBT Models 7/8 look for — watch 160.000 / 160.841 for the follow-through.
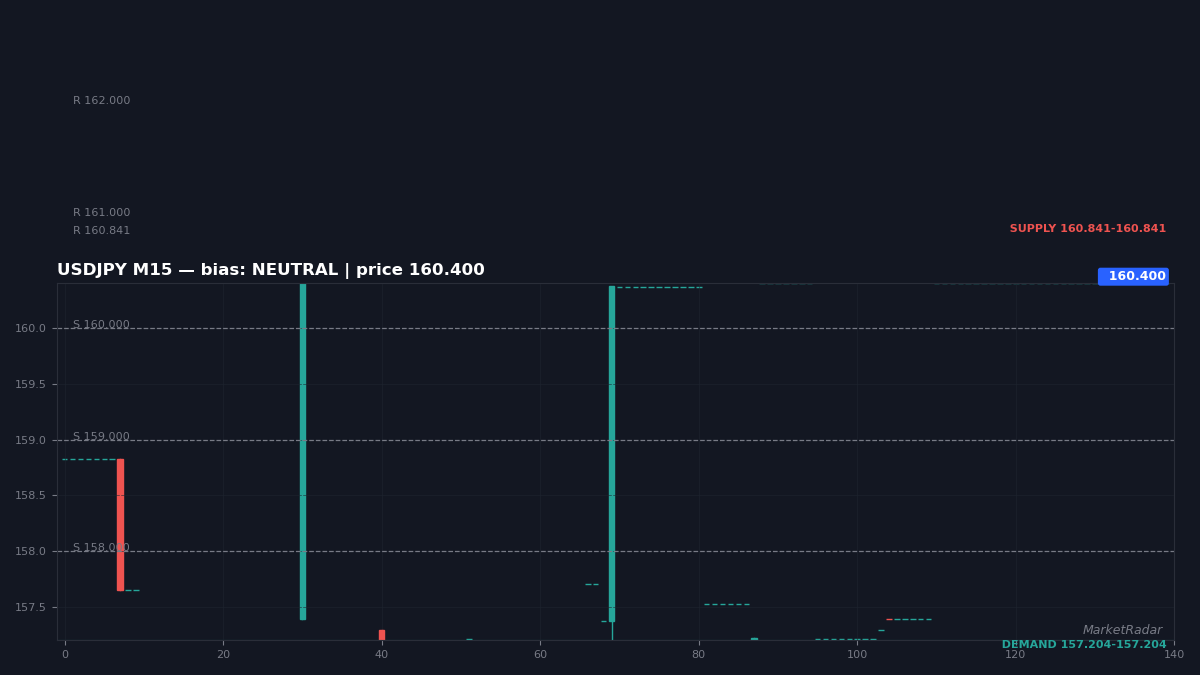
Chart reading — M15: No clean 123 on this timeframe — price is drifting neutral inside its range. Demand 157.204–157.204 below, supply 160.841–160.841 above — both PD arrays untouched; the first test decides the range scenario. No equal highs or lows stand out as liquidity magnets on the 15-minute chart.
A final note
This content is for educational purposes only and is not financial advice. Trading involves risk. Always do your own research before making any decision.